In the world of Friend, applications are neatly bundled into what's known as .fpkg files, which, quite fittingly, stands for Friend Package. These packages serve as the lifeblood of your Friend experience, containing everything necessary for your Friend applications to function seamlessly. They are based on .zip files - so if you rename the .fpkg to .zip and extract it, you will see a simple directory structure. This includes assets, graphics, and even server modules. As a Friend admin, knowing how to install these .fpkg files is crucial for expanding your Friend Workspace's capabilities.
Before you can install Friend Packages, they need to be created. Typically, this is done within the Friend Create application. Here, you'll gather all the essential components, such as code, graphics, and any server modules required for your application. Once this comprehensive package is ready, it will be saved in .fpkg format.
As a Friend admin, you wield the power to install these .fpkg files with ease. To start, navigate to one of your drives; the Home: drive in your Friend Workspace is a common choice. This is where you will upload the .fpkg file you wish to install.
After uploading the .fpkg file, it's time to install it. Right-click on the uploaded .fpkg file in your chosen drive, and from the context menu that appears, select "Install package."

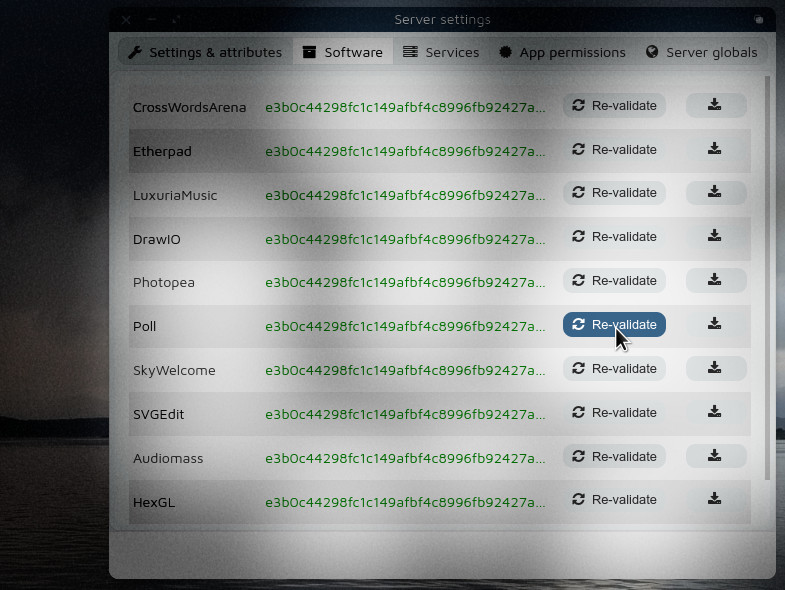
Once the .fpkg is installed, Friend ensures its integrity with the help of a checksum. This checksum verifies that the package is indeed the original file, protecting your system from tampered or corrupted packages. To manage this validation process, use the "Server" app.

With the .fpkg successfully installed and validated, your application is ready for action. To access it, follow these steps:
By following these steps, you can smoothly install, validate, and run Friend Packages, making your Friend Workspace a hub of productivity and creativity.